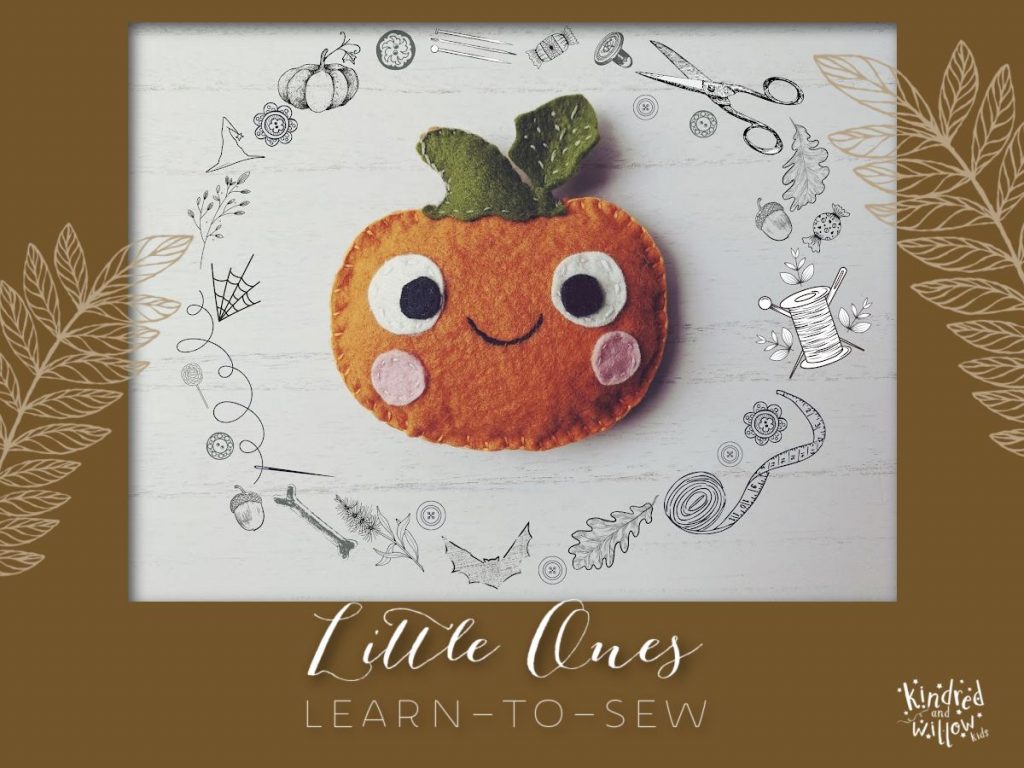
Continuing with the Little Ones Learn-to-Sew pattern series, now that it’s October (my favourite month!) I thought I would make some fall and Hallowe’en patterns for little ones to get into the spirit of the autumn season! I have some ideas for a few more to put up on here, so I’m hoping I can get them done in time and get them out to you!
ALL ABOUT LITTLE ONES LEARN-TO-SEW PATTERNS
All Little Ones Learn-to-Sew patterns are simple patterns with few pieces and easy-to-follow instructions that are designed so that older children should be able to do them with little help and smaller children will also be able to do them with just a little guidance. Of course, although these patterns are designed with children in mind, they are really for everyone to enjoy!
The printable download includes the pattern plus the instructions all on one page, so they are ideal if you are printing them for a class or a Guide group, etc. and don’t want to print multiple pages per person.
All the materials you need for these patterns is a little felt, embroidery floss, and stuffing. Tools are just scissors, an embroidery needle and pins.
I came up with the idea for these simple little patterns when my daughter needed a project for her Family Studies class. I hope they inspire little ones to try their hand at sewing!
LITTLE ONES LEARN-TO-SEW PATTERNS:
- Use wool felt – which is thick, doesn’t fray and is easy for children to work with
- Are small projects – easy to complete in a short time
- Use few pieces – not an overwhelming amount to put together for a beginner
- Use simple, easy to follow instructions
I hope you will enjoy these patterns! Please do let me know if you have any questions or if anything is unclear and I will amend the pattern instructions for greater clarity. Thank you ♥
FELT Pumpkin TUTORIAL
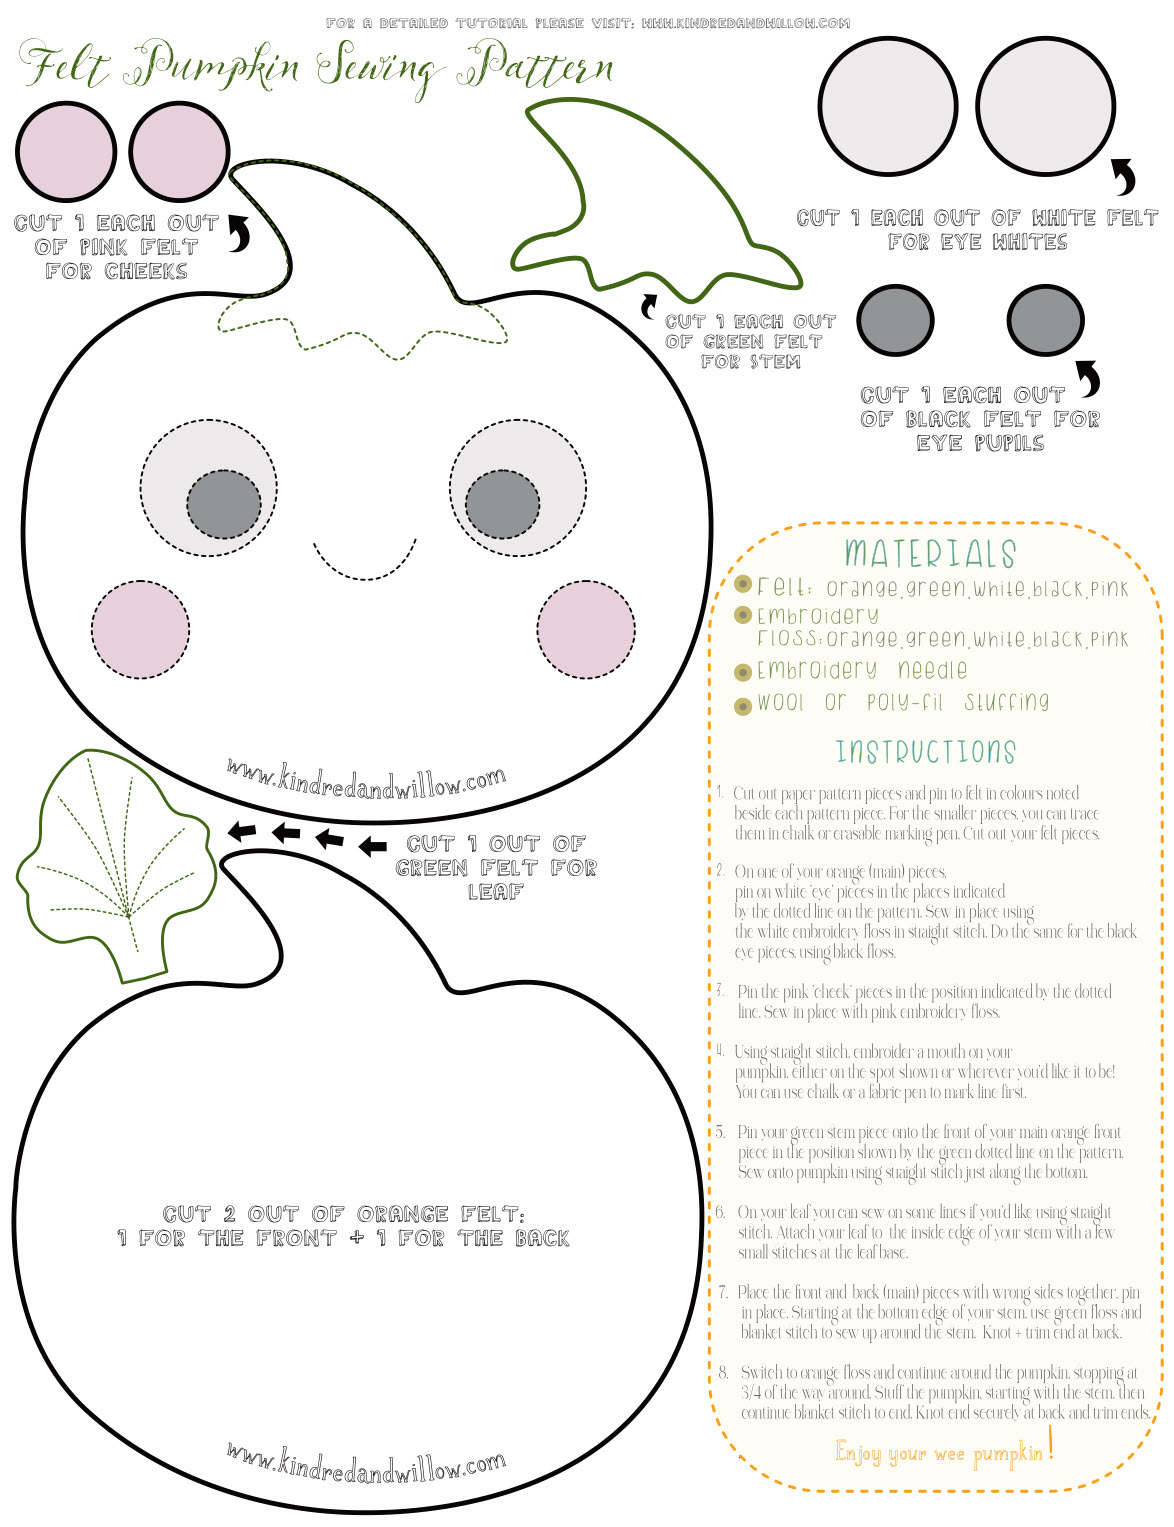
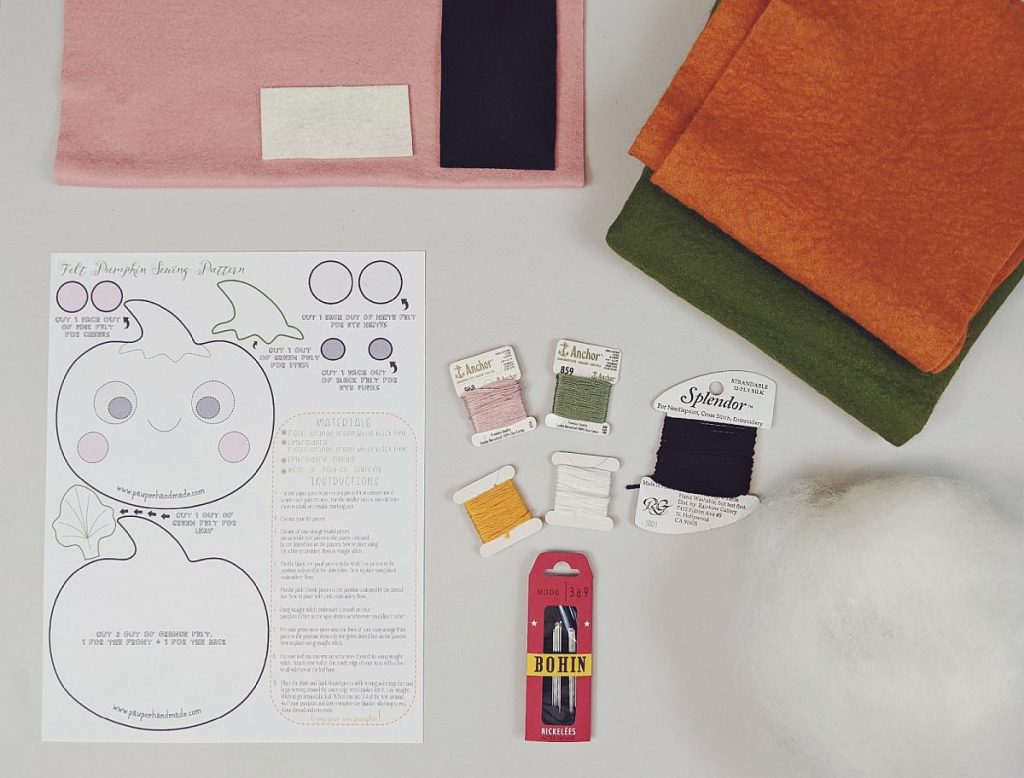
WHAT YOU WILL NEED
- Printed Pumpkin pattern – see bottom of this post for free printable pattern
- Wool blend felt – orange, green, white, black, pink
- Embroidery floss – orange, green, white, black, pink
- Raw wool or poly-fil stuffing
- Embroidery needle
- Pins
- Sewing scissors (or scissors sharp enough to cut felt)
HOW TO MAKE YOUR FELT Pumpkin
Step 1: Gather all your materials and tools – wool felt, embroidery floss, stuffing, embroidery needle, pins, scissors and printed pattern.
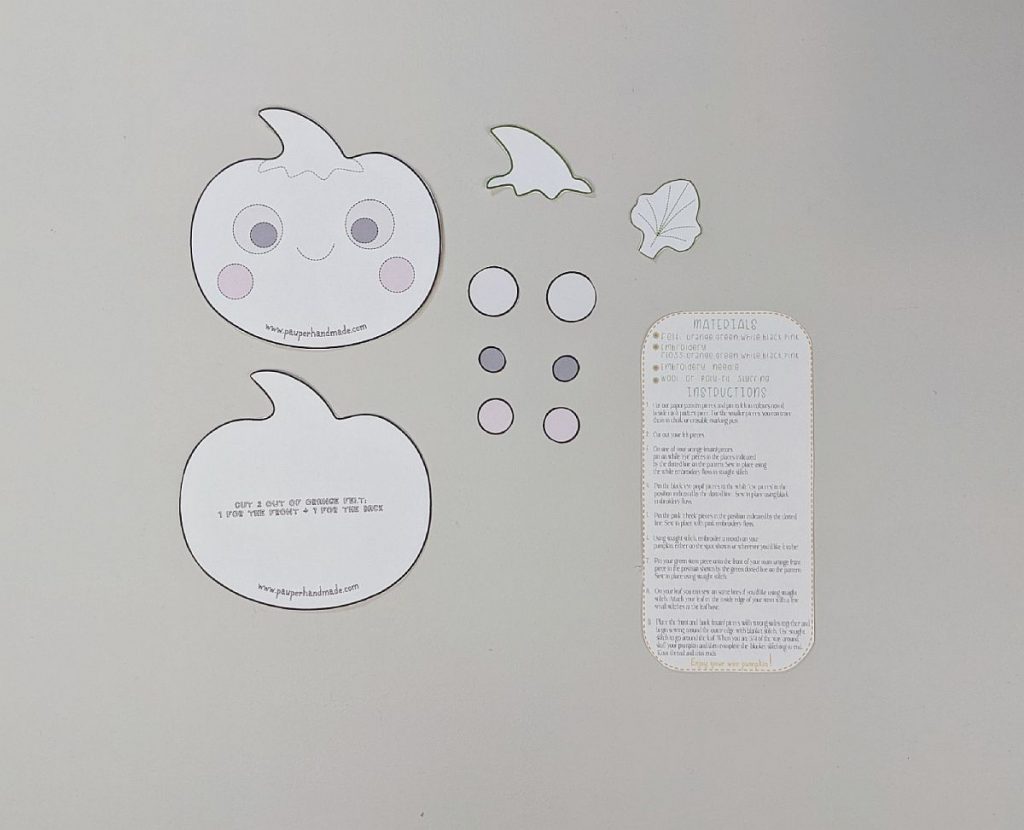
Step 2: Cut out all the pieces of your pattern. Cut just outside the black outline of each pattern piece. Keep the instruction card so you can refer to it as you’re working.
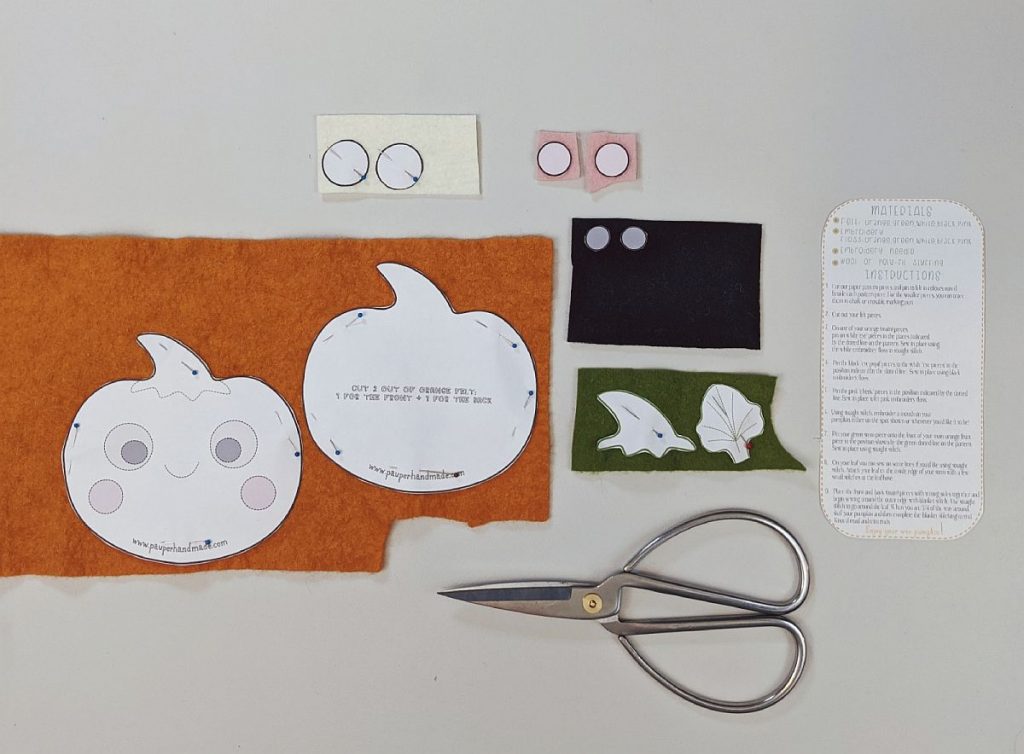
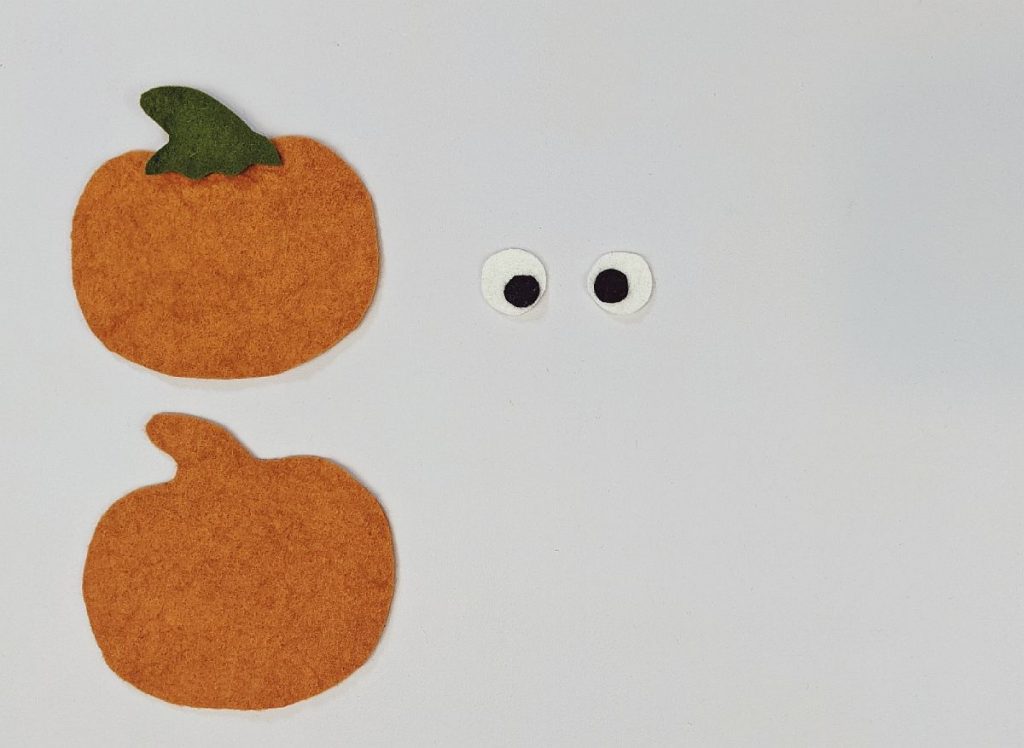
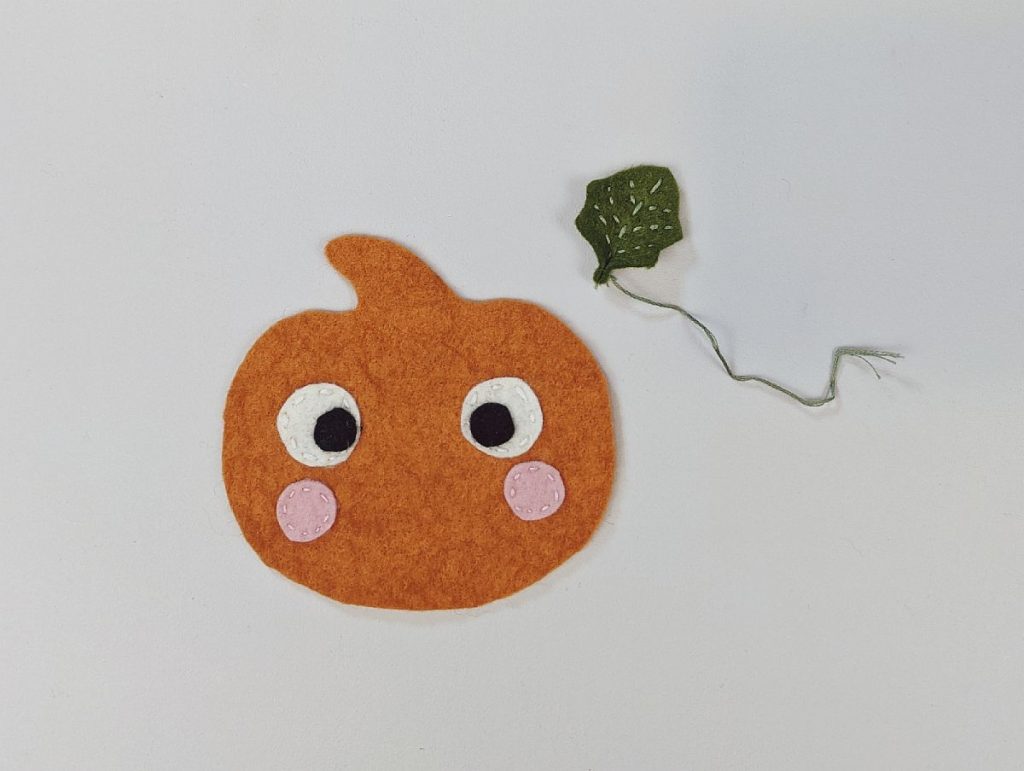
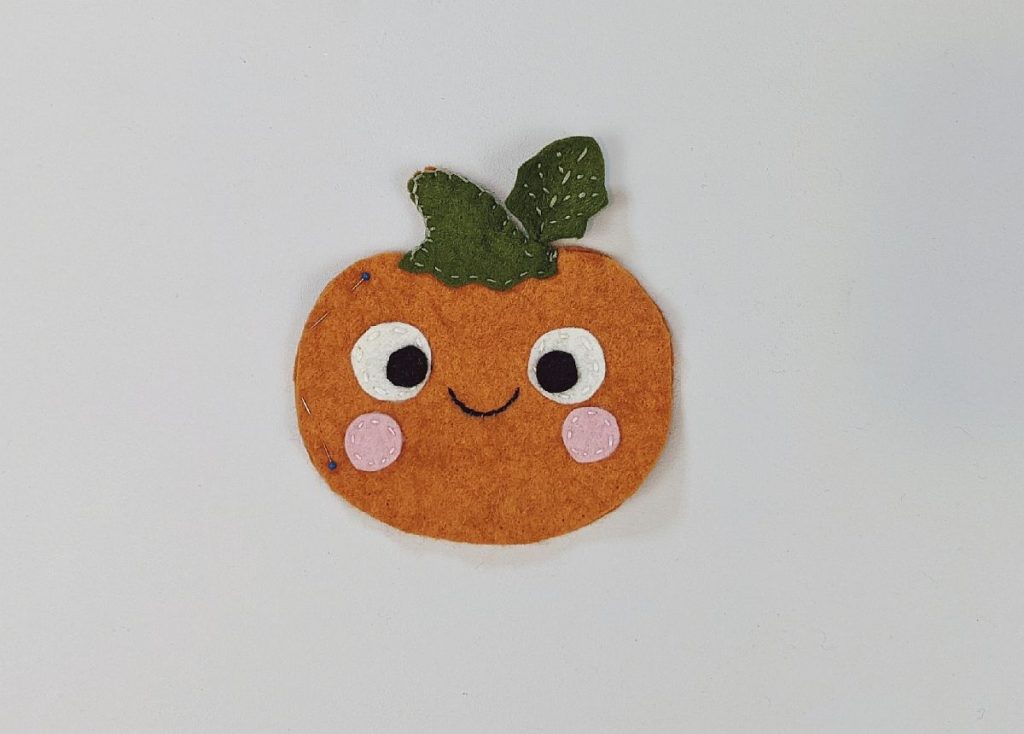
Step 3: Pin your pattern pieces to the wool felt. You should have 2 main pieces in orange, 2 white pieces for the eyes, 2 black pieces for the eye pupils, 2 pink pieces for the cheeks, 1 green stem and 1 green leaf. Some of the smaller pieces are difficult to pin, so it might be easier to trace these in chalk or a washable fabric marker.
Step 4: Carefully cut out all your felt pieces.
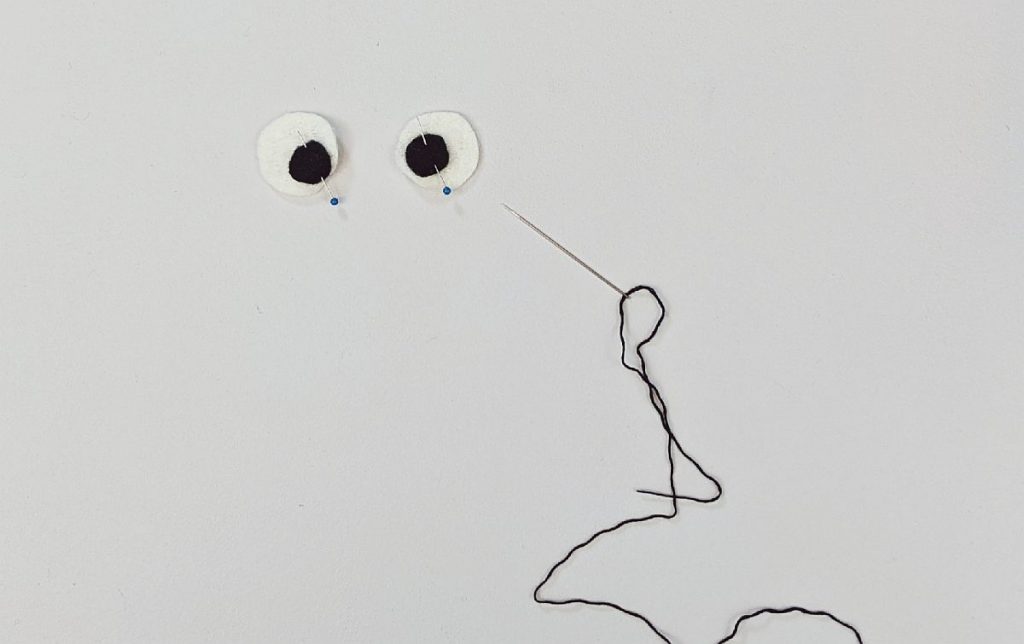
Step 5: Pin the black ‘pupil’ pieces onto the white eye pieces in the places indicated by the dotted line on the pattern, or wherever you’d like them- just depends on the look you’d like!
In the paper instructions (printed with the pattern) I’ve said to sew the eye whites onto the pumpkin first… you can do it in whatever order you’d like for that bit. I should have followed my own instructions as I was taking the photos for the tutorial!
Step 6: Using a straight stitch and with black embroidery floss, sew each black piece in place. Set these aside for a minute while we prepare the ‘leaf’.
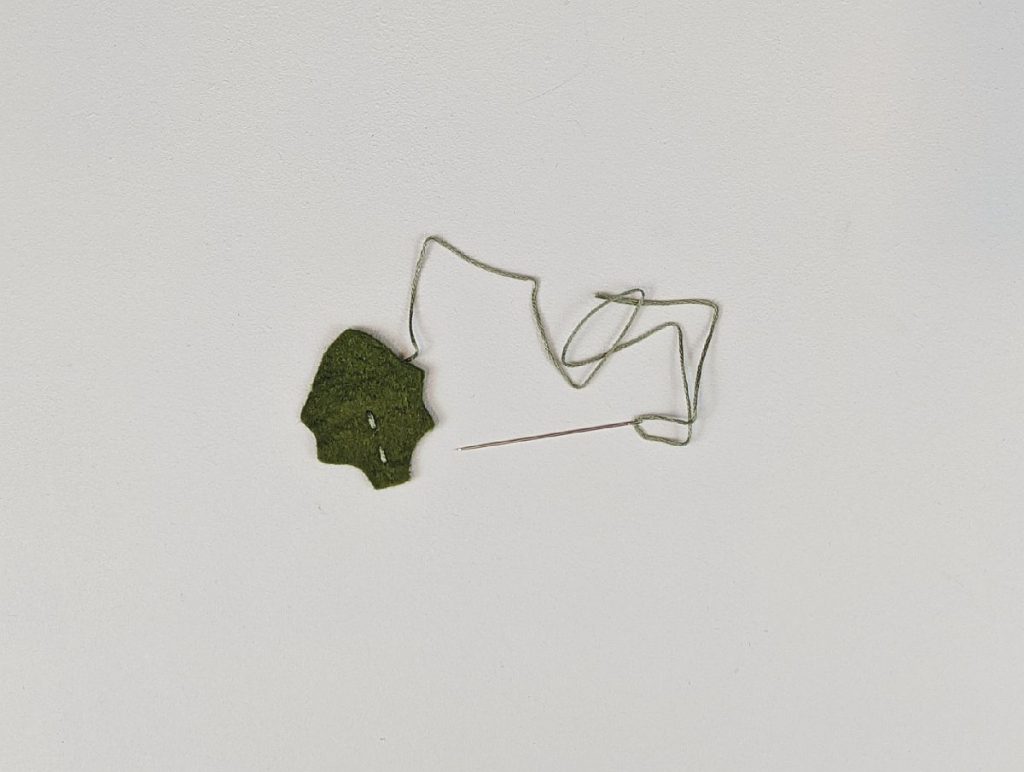
Step 7: You will now prepare your ‘leaf’. Using straight stitch and green embroidery floss, sew some veins onto your leaf.
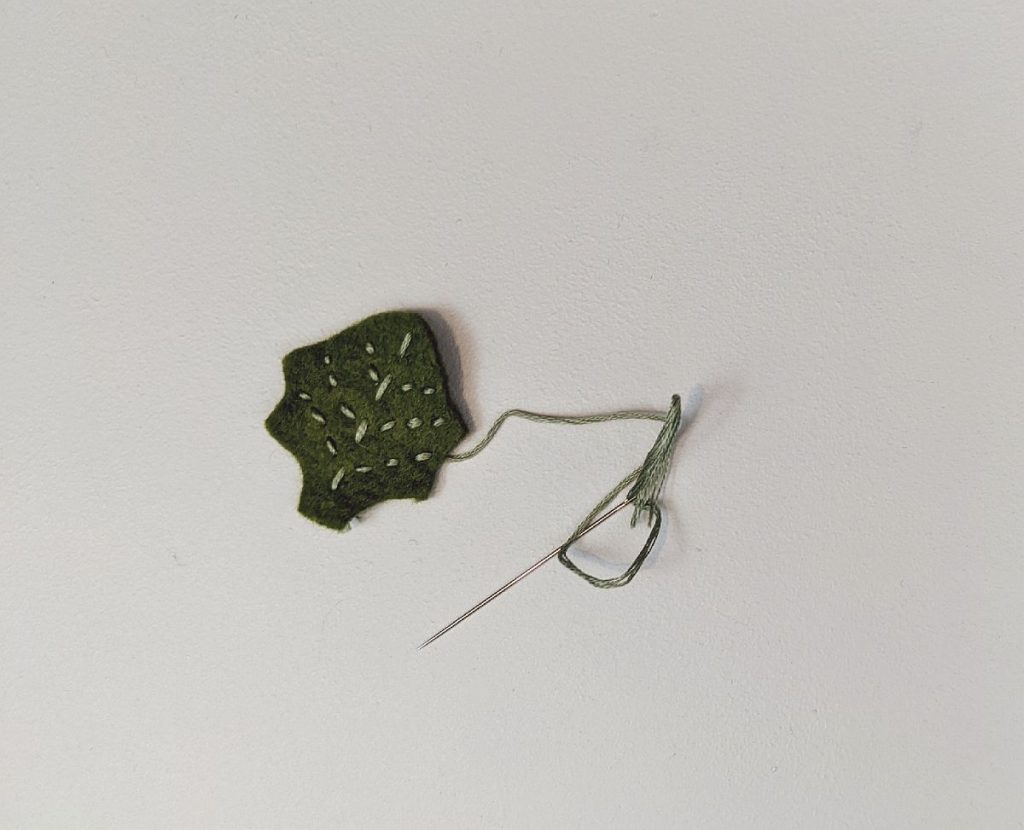
Step 8: Continue with the straight stitch until you’re happy with your leaf design.
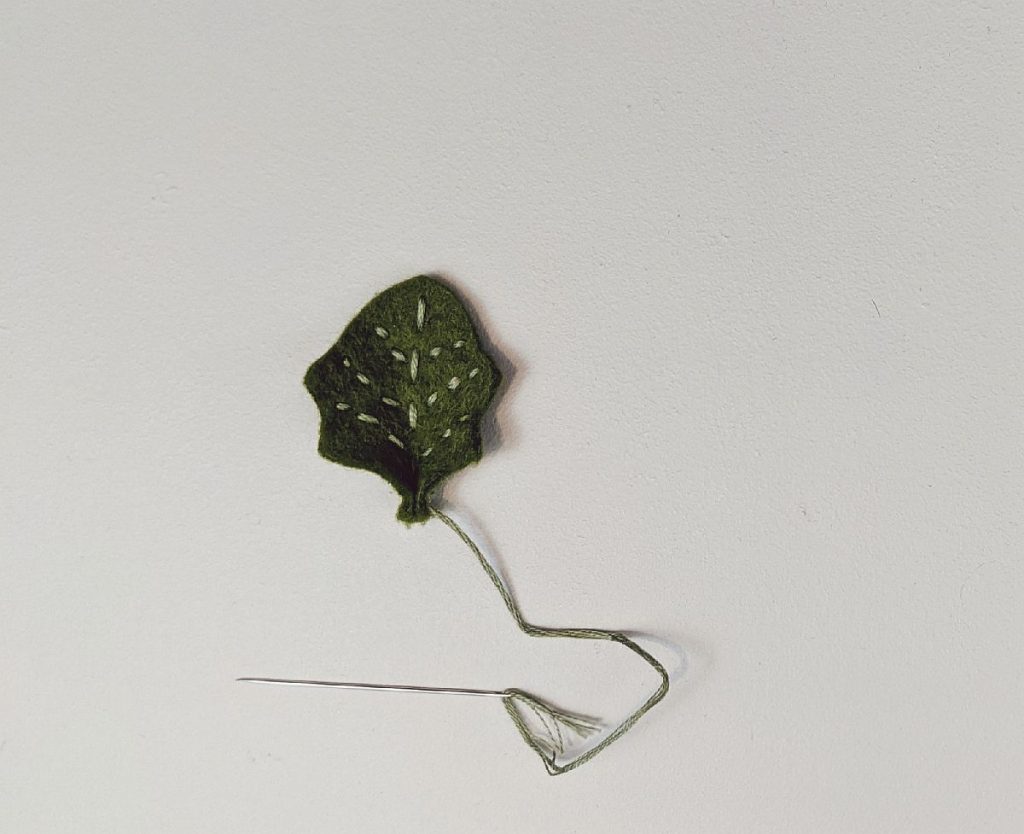
Step 9: At the bottom of the leaf, you can pinch the ‘stem’ bit together and secure with a few stitches. This just makes your leaf curl up nicely atop your pumpkin ♥ Set your leaf aside for now and leave the thread as is (don’t trim it off just yet – if you already did, not too worry, you can always add another on!).
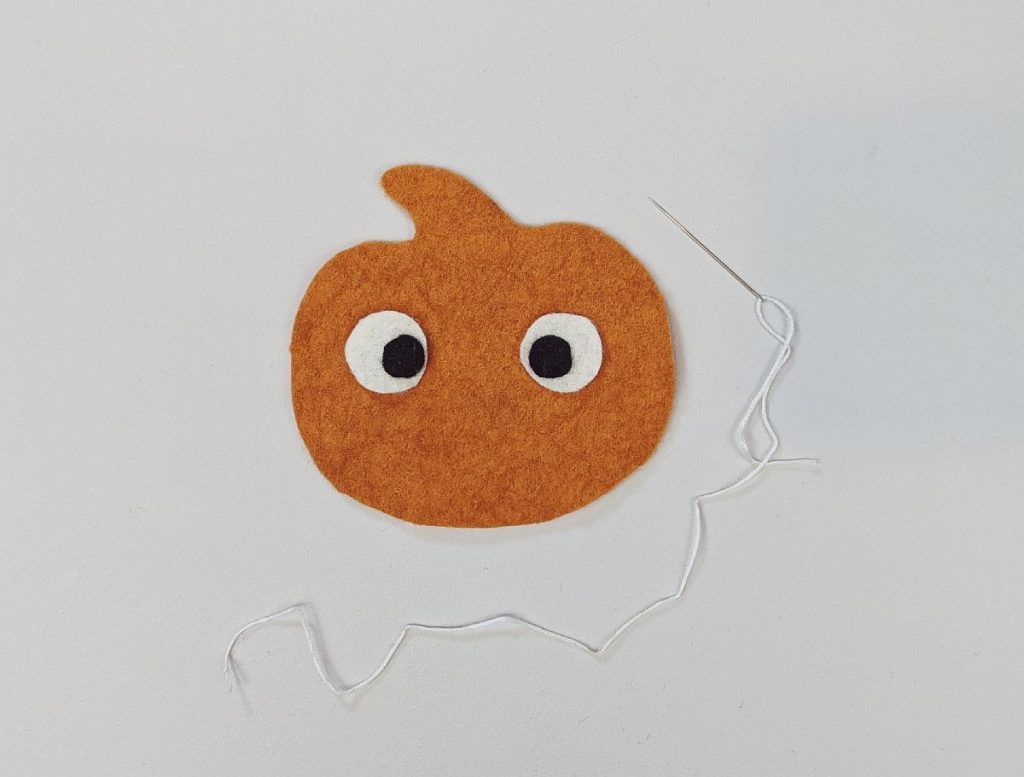
Step 10: Take the prepared ‘eye’ pieces and place them on your pumpkin wherever you’d like them to be – just not too close to the edge of the pumpkin as you will need room to sew the outer edges there. Pin in place.
Step 11: Using white embroidery floss and using straight stitch sew the eye pieces in place.
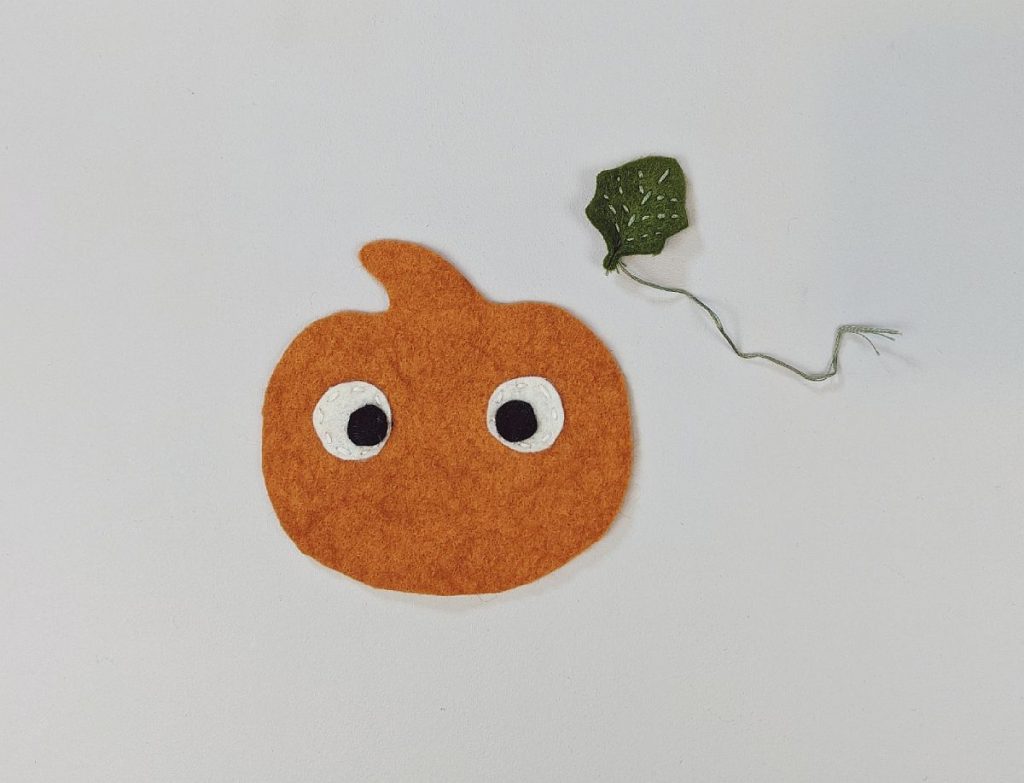
Step 12: Now take your pink ‘cheek’ pieces and place them where you’d like them to be. If you don’t want ‘rosy’ cheeks on your pumpkin you can skip this step!
Step 13: Using pink embroidery floss and using straight stitch, sew ‘cheek’ pieces in place.
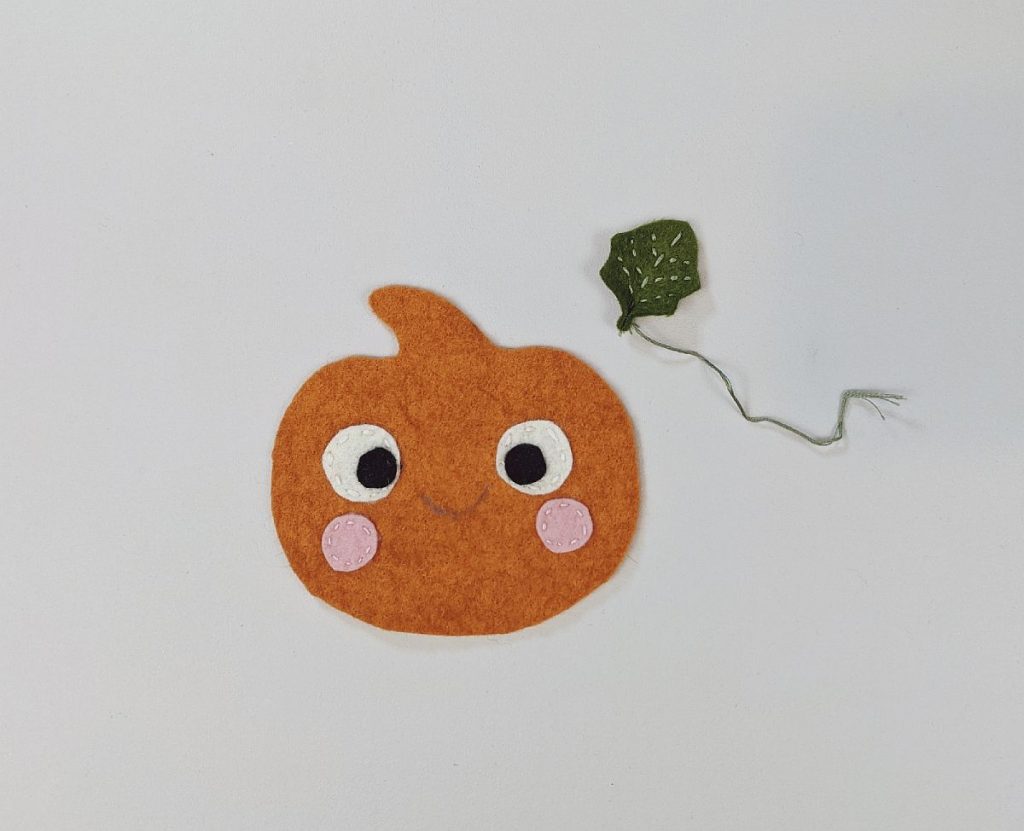
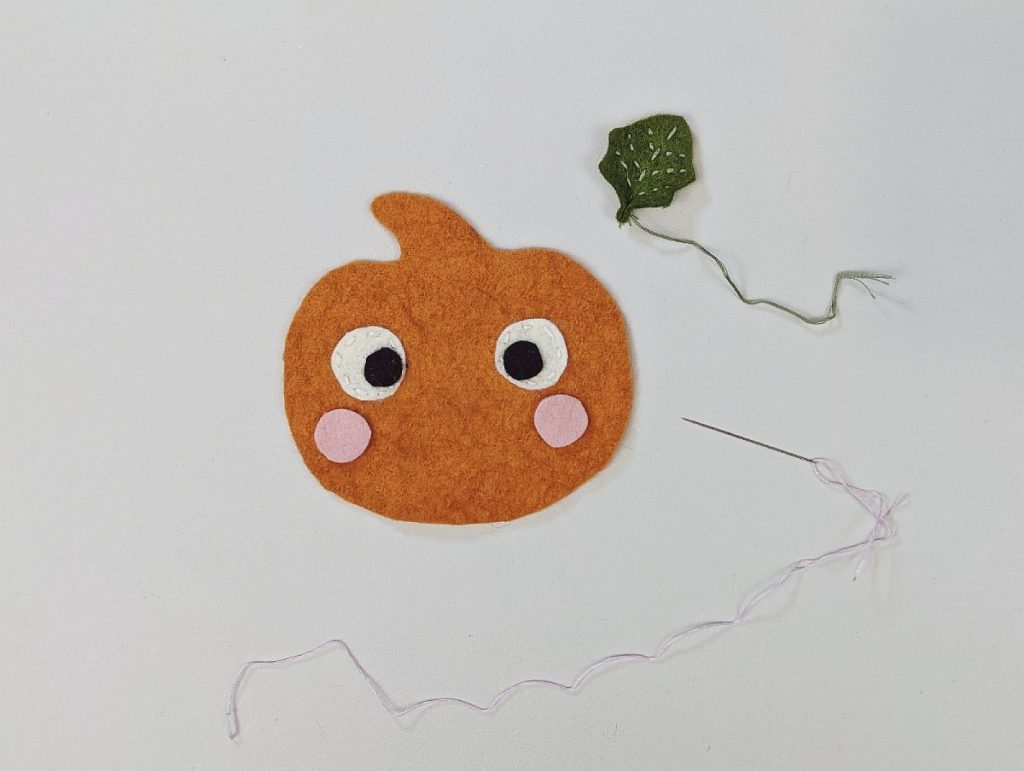
Step 14: Using sewing chalk or an erasable sewing marker, make a mark where you’d like your mouth to appear.
Step 15: Using black embroidery floss and using straight stitch, sew along the line you made to form the mouth.
Step 16: You can leave the mouth as is, or go back along your previous stitching: slip a stitch underneath each straight stitch to smooth out the line of stitching. This is called ‘whipped running stitch’. I hope to add a little video to demonstrate, but in the meantime you can also search for videos online demonstrating this stitch.
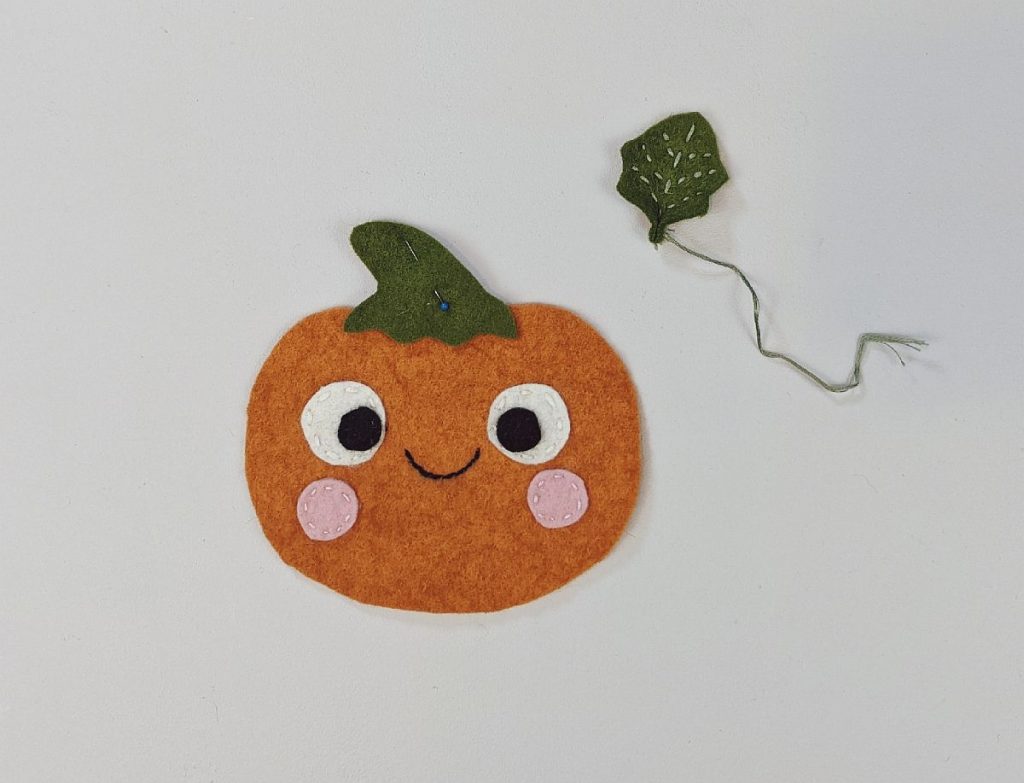
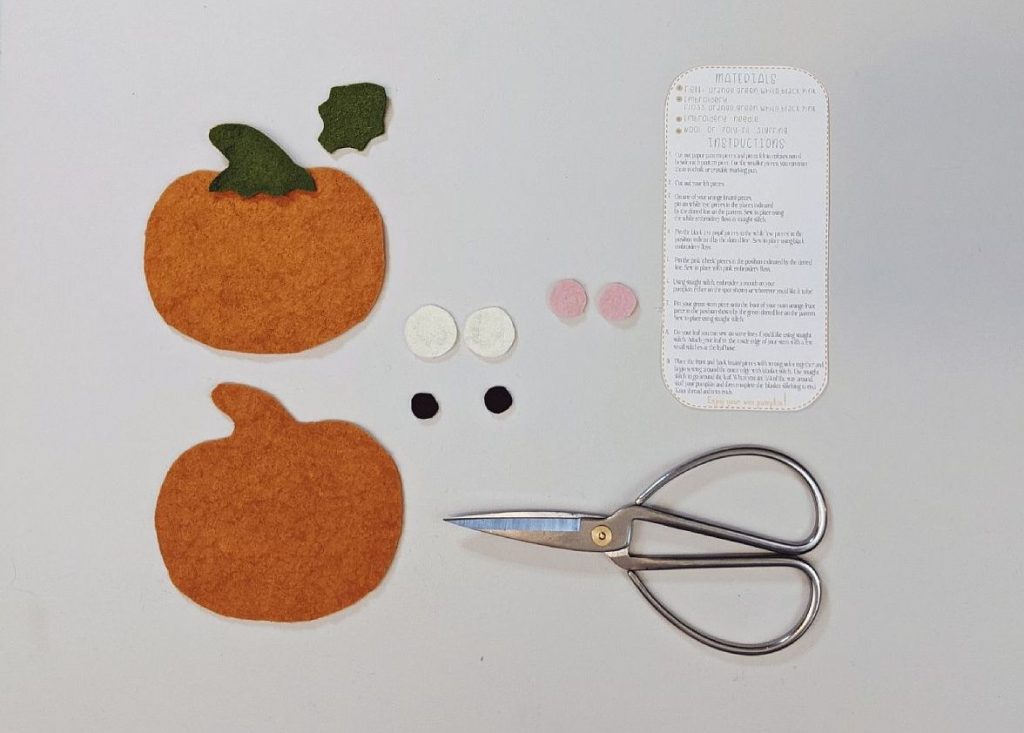
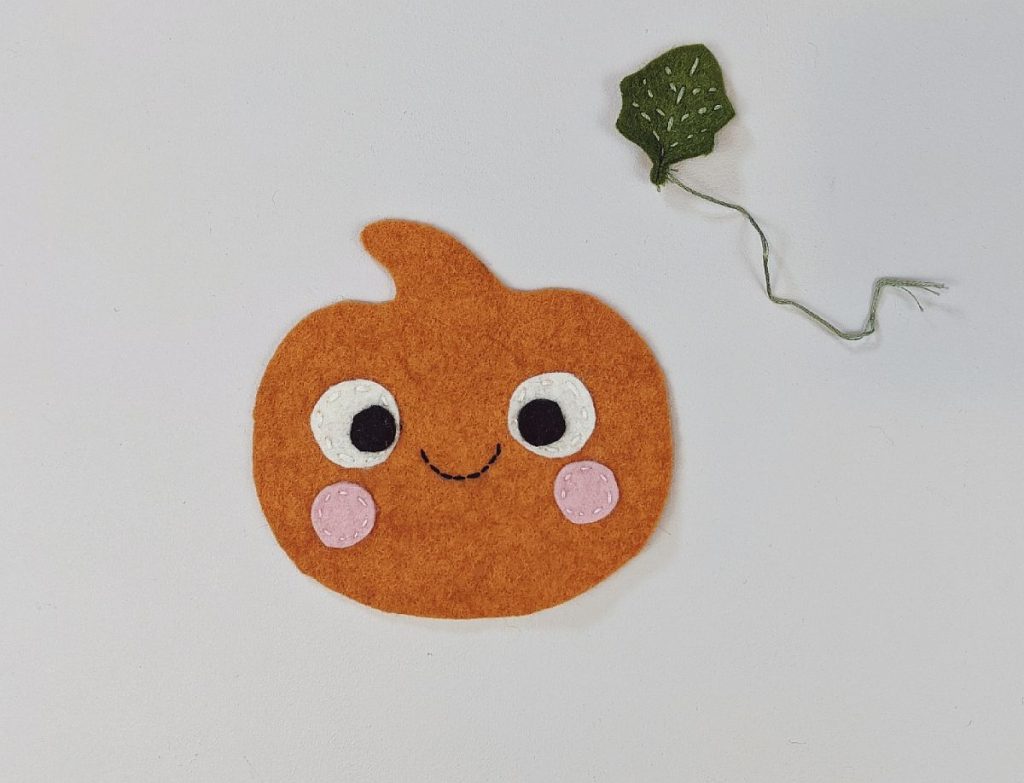
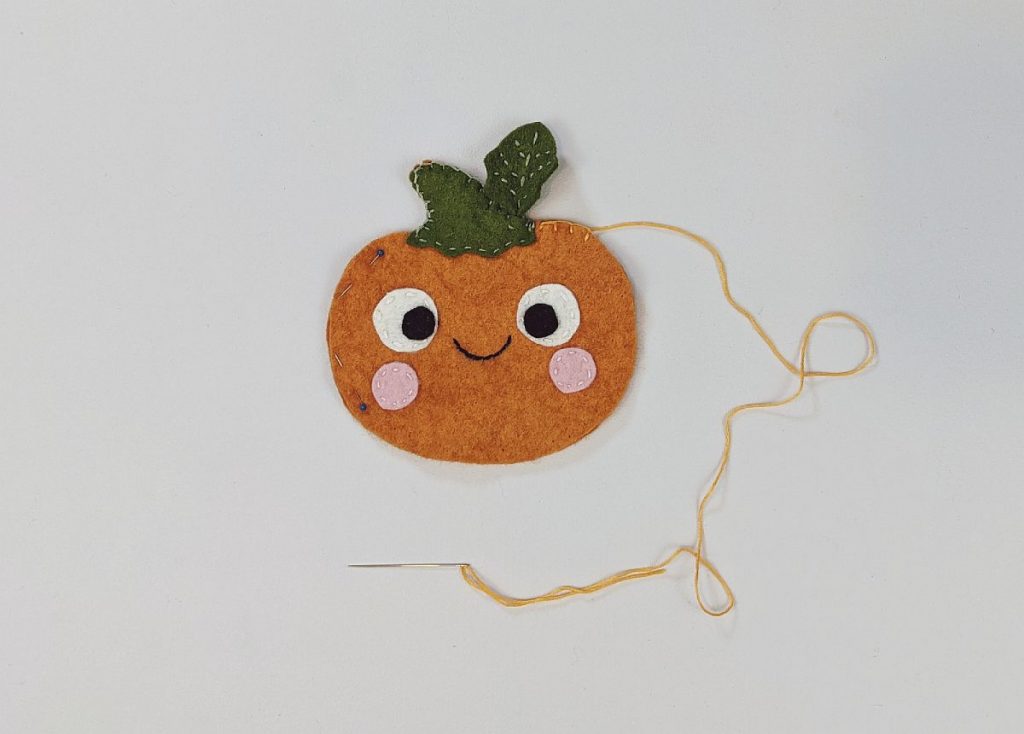
Step 17: Take your green ‘stem’ piece and place it overtop of the orange ‘stem’ area. Pin in place.
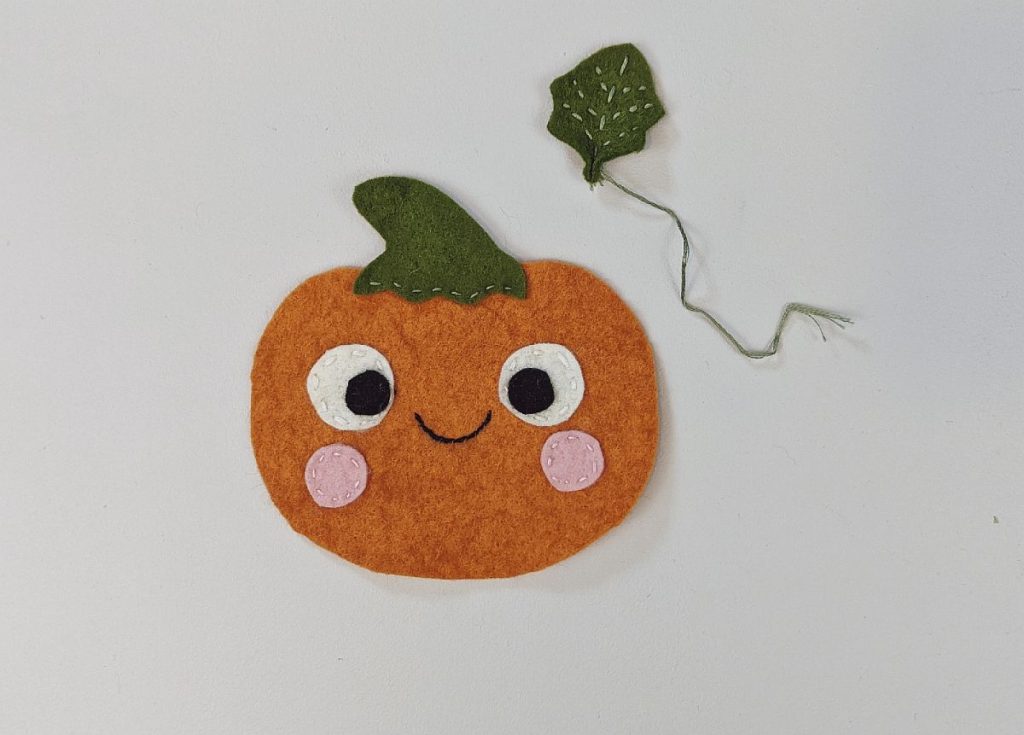
Step 18: Using green embroidery thread and straight stitch, stitch the ‘stem’ in place along the bottom edge. Knot thread at back and trim end.
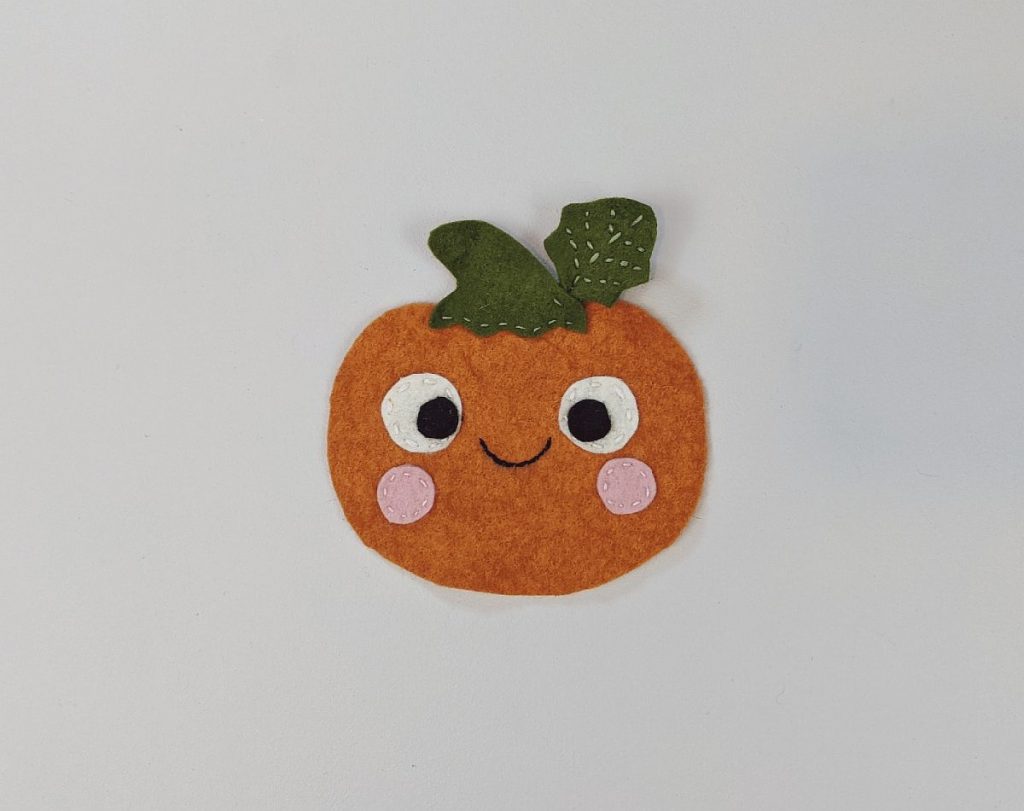
Step 19: Using green embroidery thread, place your leaf end at the back lower edge of the stem and stitch in place using a few small straight stitches. Knot at back and trim end.
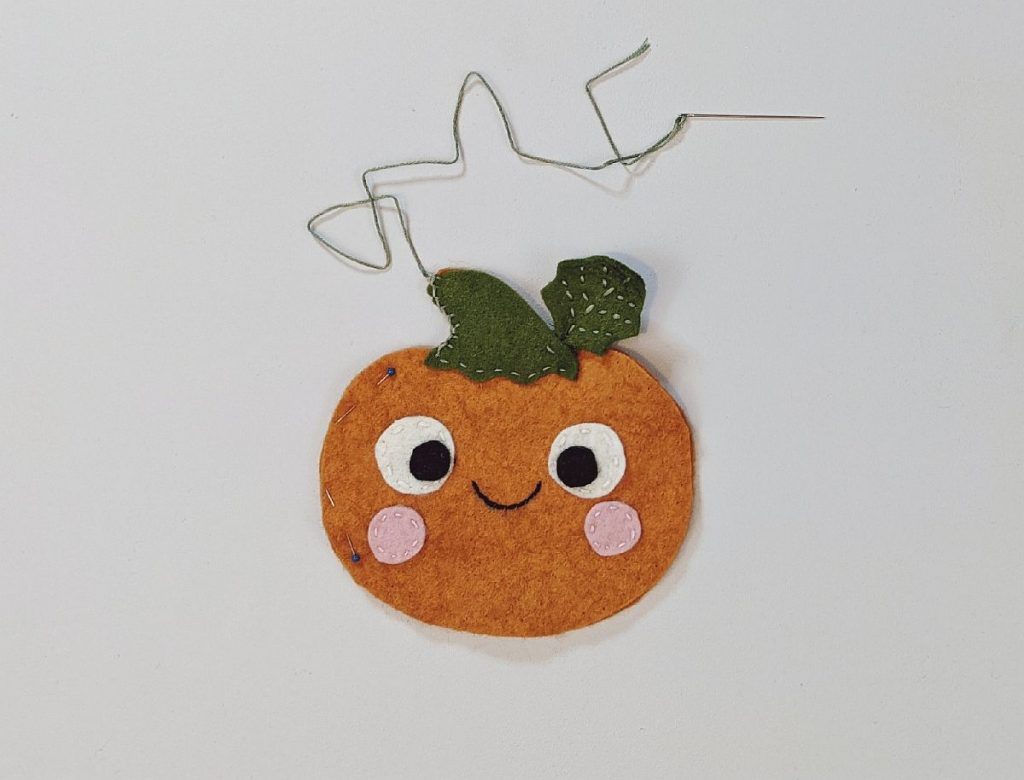
Step 20: Now place your two orange pumpkin pieces with wrong sides together (make sure that your pumpkin’s face is to the outside) and make sure edges are matching up evenly. Place a few pins to hold it together.
Step 21: Thread your needle with a long (about 20 inch) piece of green embroidery floss and beginning at the bottom corner of one side of the stem, begin blanket stitching around the stem. Do your best to stitch around the leaf when you get to it – it’s a bit tricky at that part!
Step 22: When you reach the bottom edge of the green stem, knot your thread and snip off end.
Step 23: Now thread your needle with a very long (about 55 inches) orange embroidery floss and beginning where you ended sewing at the stem, begin blanket stitching around the edge of the pumpkin using blanket stitch. Stop when you get 3/4 of the way around the pumpkin (leaving about a 3 inch gap open).
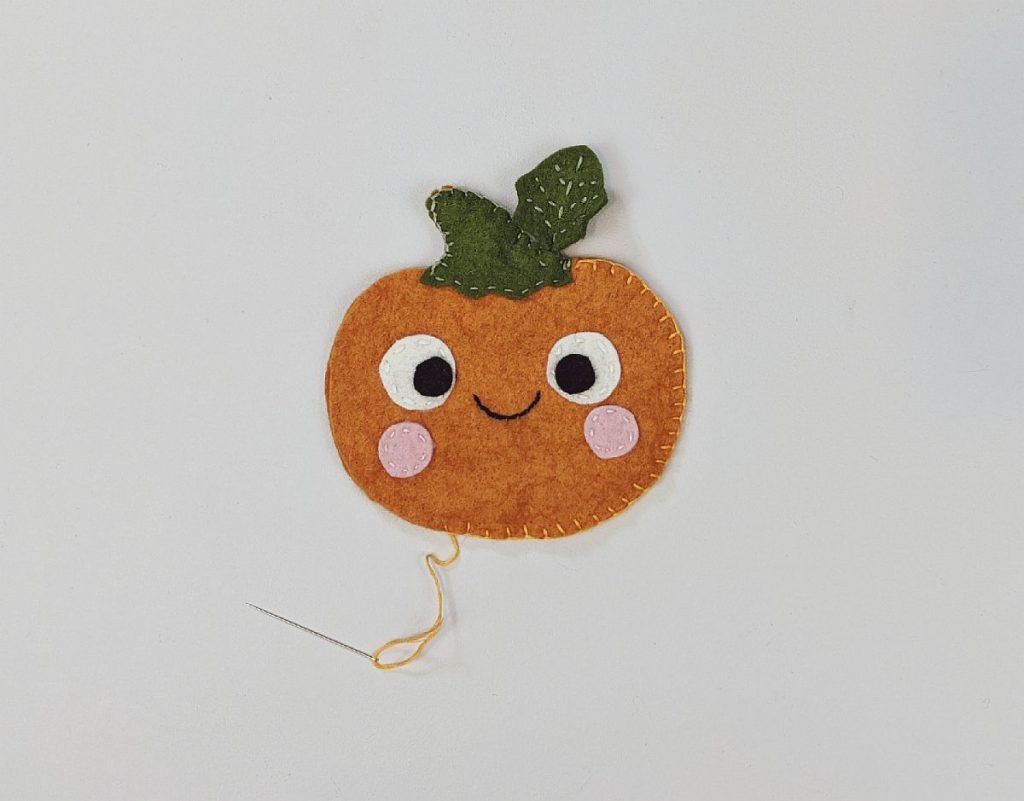
Step 24: Now that you have sewn 3/4 of the way around your pumpkin, stop here and gather your stuffing material.
Step 25: Time to start stuffing your pumpkin! Begin by pushing some stuffing up into the ‘stem’ and then continue until your pumpkin is nice and plump. Now you’ll be continuing blanket stitch around the rest of the pumpkin.
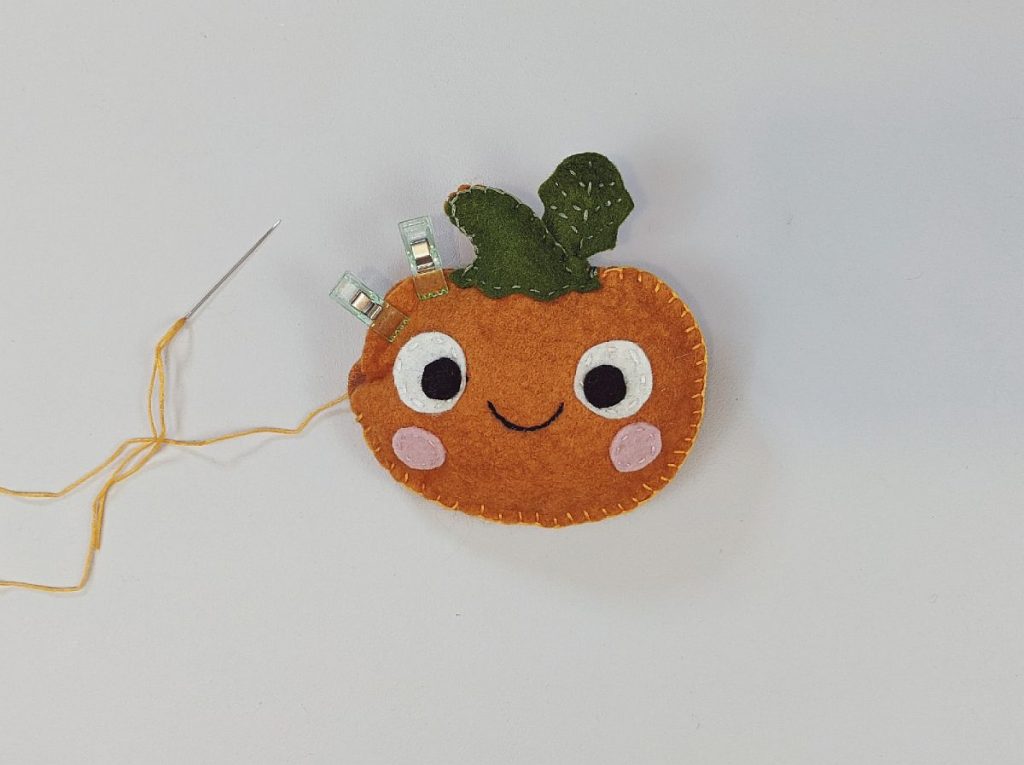
Step 26: If you’re finding it tricky to sew up the rest of the pumpkin without the stuffing coming out, you can keep the gap closed using sewing clips (as shown above) or a few pins (just mind your fingers!).
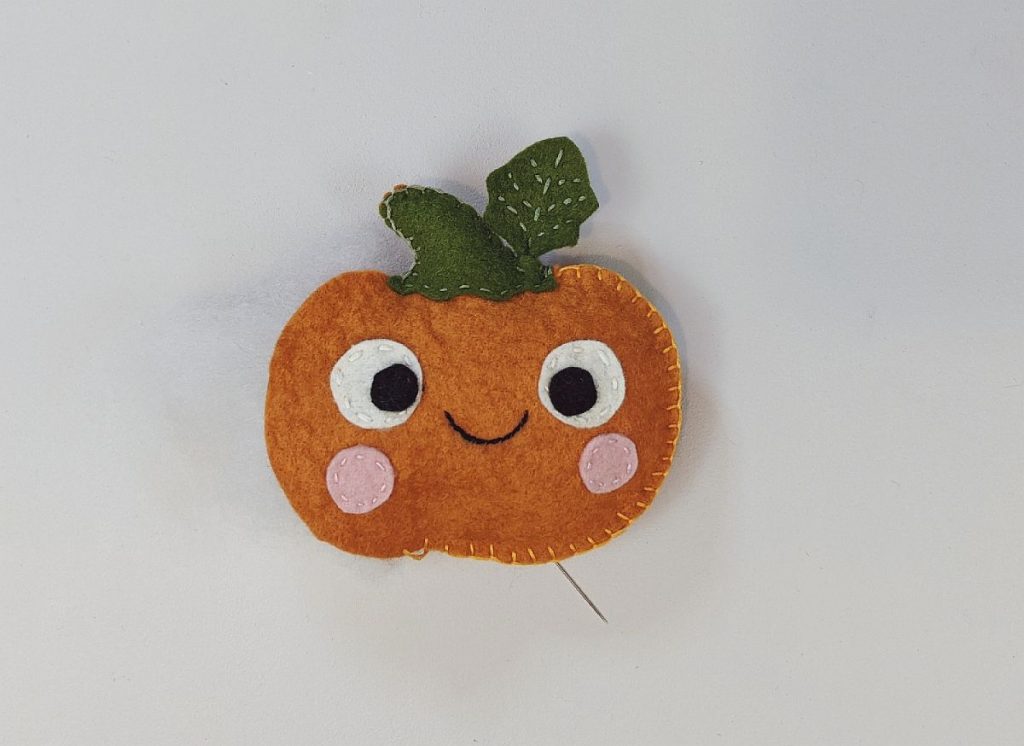
Continue stitching until you reach the point where you started sewing. Now just knot the thread at the back and trim ends.
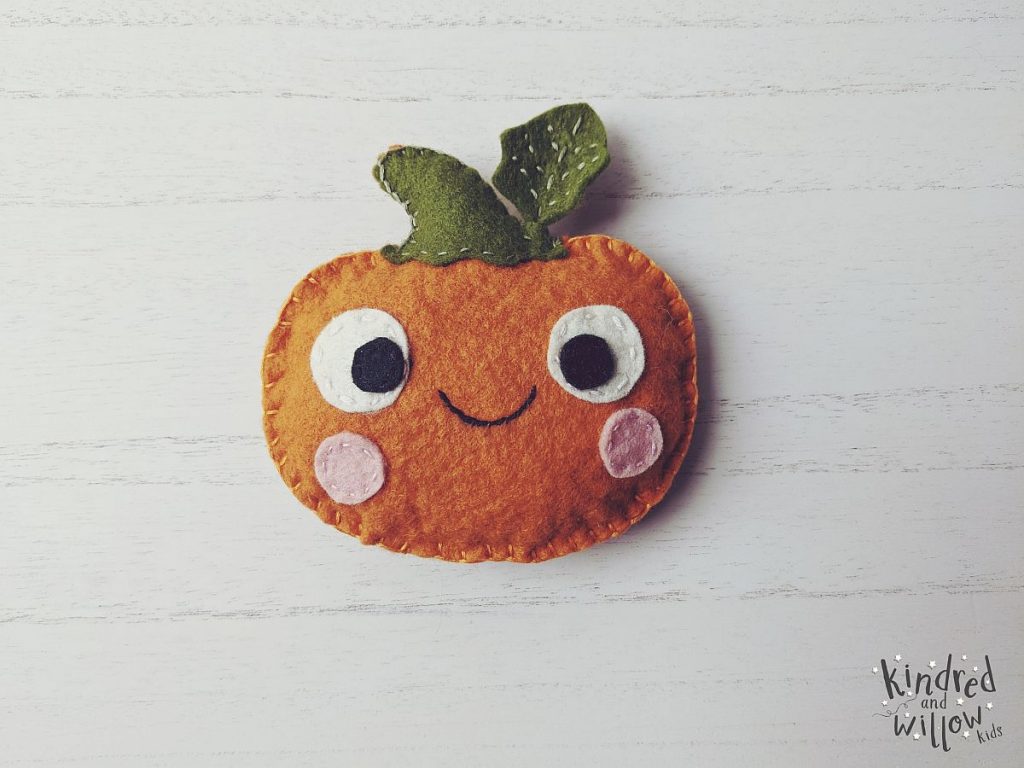
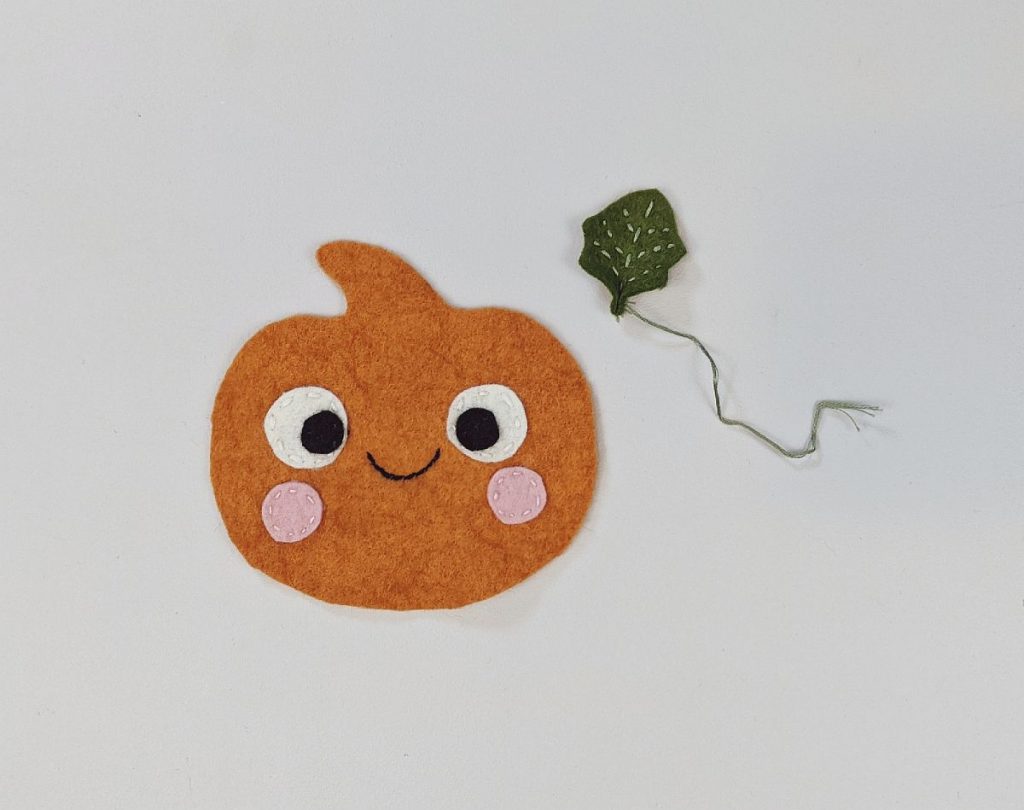
Et voilà! Your little pumpkin is complete! Give yourself a pat on the back for all your hard work ♥
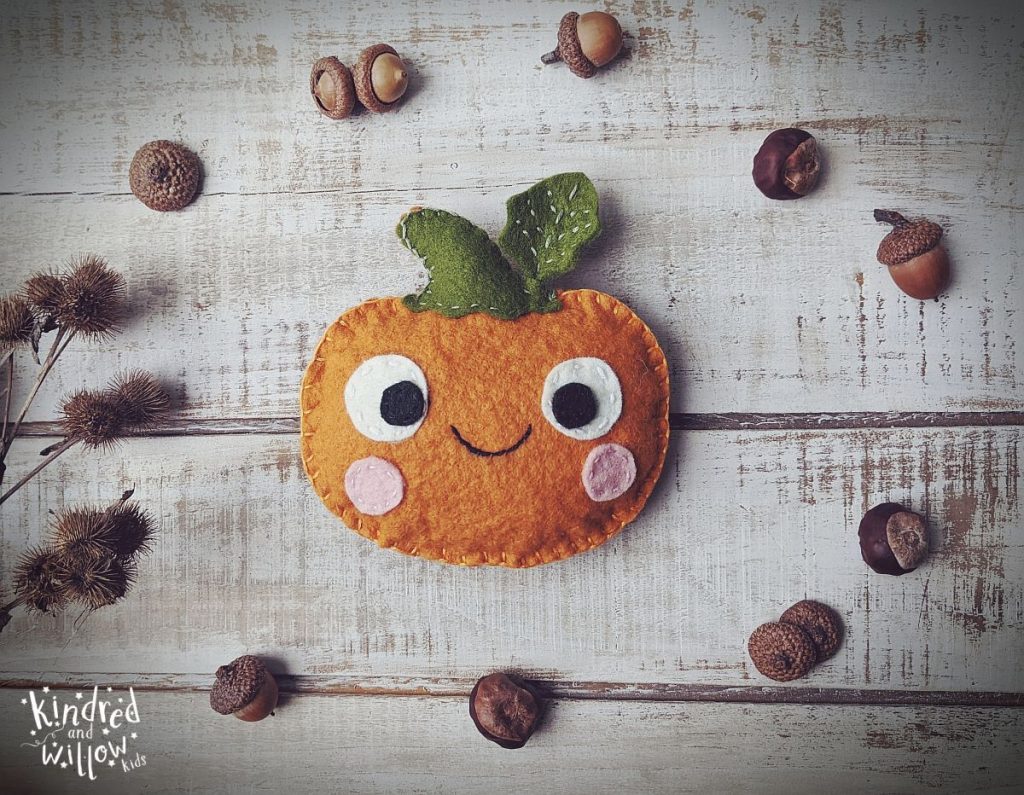
Place your new little friend in a nice fall setting as a cute Thanksgiving decoration, or give to a friend!
You could also sew a little felt loop and a carabiner clip and attach your pumpkin to your backpack to make it a little festive too ♥ Just cut an orange piece of felt that is 3 inches long and 1 inch wide, fold it in half and stitch it to the side at the back of your pumpkin, then attach a clip or carabiner and your new little friend is ready to adorn your backpack!
I hope you found this pattern and tutorial easy to follow! Best wishes and happy crafting ♥
FELT pumpkin PRINTABLE PATTERN
Here is the Felt Pumpkin printable pattern.
NOTE: Please make sure that the document is set to ‘actual size’ in your print options so that the pattern prints out at the proper size!
Please click on the image below or this link to download the PDF.